Managing Users
Users create, update, and publish apps, as well as administer the Ivanti incapptic Connect system. Every user has a role that coincides with their required tasks. This section explains how to onboard, provision, and maintain your users.
User management for systems using single sign-on (SSO) authentication may differ.
Inviting new users
You must invite new users to Ivanti incapptic Connect. A new user needs to accept and to create their own profile user account before they can use Ivanti incapptic Connect. You can generate these invitations from several places:
- The Users > management page
- The App Creation page
- The permission page for each app.
The most convenient way to invite new users is from the Users management page.
Procedure
-
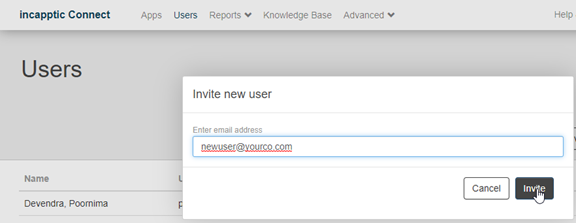
From the Ivanti incapptic Connect Users page, click Invite new user. The Invite new user window opens.
Figure 1. Inviting a new Ivanti incapptic Connect user
-
Enter the email address of the invitee. The email is rejected if it is not valid or already used for an existing user in the system.
-
Click Invite.
The user receives an email notification that includes a link to the registration page for your system. After registration, the user is automatically logged in. When the invitee registers, the person sending the invitation is notified by email.
User details page: Modifying user properties
You can modify user properties with the user details page.
User information
Administrators can modify user properties (other than their email address) from the Users > details page.
Most of the User Information section is the same as the user profile described in Modifying your user profile. However, on this page, you can take the following additional actions:
API token
The API token section is similar to the API token tool described in Using API tokens. However, on this page, you can take the following additional actions:
Delete User
When a user is deleted, all role assignments—including app-specific roles—are removed as well. An app with no owner can cause organizational issues. In those cases, a notification email is sent to everyone with the User Management role, alerting them to the issue.
Reset Password
There are two ways to reset a user's password:
-
Reset Password: The password resets to a new secure, temporary password that is disclosed to the user through a choice of secure channels. Once logged in, the user must change his password before he can continue.
-
Send reset password link: The secure temporary password is sent to the user’s email address. In the email, the user receives a link to change the password. The temporary password is only valid for 1 day.
If the temporary password in the link is not used to log in, the old password remains valid.
User details page: Assigned Roles
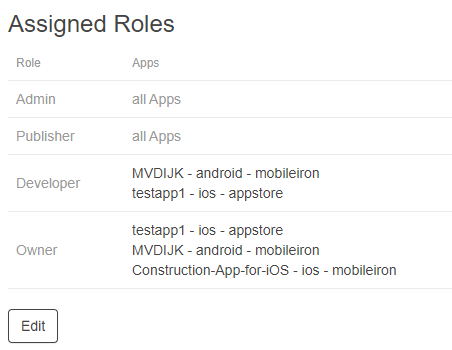
The Assigned Roles section allows you to designate or modify the roles that give the user access to different parts of the system. See Assigning users to Developer and App Owner roles.
Figure 2. Assigned roles section of User Details page
Failed login attempts
The Failed login attempts section displays the last five failed log in attempts.